Dienstag, 12. März 2019

Palisades

As my vision of Middle Earth is a lot more Dark Ages than that of Peter Jackson (I'm looking at the illustrations in The One Ring...), there's too much stone in the movies. Encampments and fortifications should look like an early medieval Motte than those castles that have fallen into ruin.

So, there have to be wooden palisades instead - and I've started to build one, beginning with the entrance.

The materials: Wooden craft sticks, some wooden chopsticks, twine, cardboard and coffee stirrers.


First, we begin with building sections of palisades by binding eight craft sticks together with twine.  Two sections will then be attached to higher beams, made from chopsticks.


Don't throw away the end pieces of the chopsticks yet - we'll make the frame for the gate from them.


Next, we'll do the base. As the wooden stakes would be dug into the ground, we'll use some structure paste to form the earthworks. Form a narrow slit and fill it with PVA glue.

Paint the palisades a dark brown, drybrushing with beige, so the twine looks like rope.


Now, we erect the palisade, putting the walls into the earthworks. Supports are cut from craft sticks and glued to the main beams.

As it will be harder to reach some parts of the base afterwards, we already paint and flock the base.

From cardboard, cut two 2,5 cm wide ledges and cut craft sticks to size that will support the parapet. Glue them to the cardboard and glue the parapets onto the walls and base.


While the glue sets, we'll build the gatehouse. This was used for storing spare arrows and tar in case of an attack, so it is rather small and placed right atop of the gates.

The basic house is made from cardboard and glued together. 


While the glue dries, we build the gates. Cut some coffee stirrers to size and glue them to two other stirrers, so you built two leaves. Paint them a dark brown and drybrush them with beige.


Now let's get back to the gatehouse. The cardboard house is covered in wood, coffee stirrers again. Cut them and glue them to the cardboard base. Paint it a dark brown, drybrushing it with beige.


The parapet is also covered with wood and painted. While glue and paint dry, we'll build two ladders for the fighters to get up on the parapets.
Take two craft sticks and a coffee stirrer. Now, cut the stirrer to the desired length of the steps and cut four steps from one piece of stirrer. Form the ladder by glueing the steps to the sticks.


After painting the ladders, they are glued to the parapet and the base.


No, glue the gates into the frame, securing them on the base.

Now, we'll use beige and light grey to weather the wood. paint the tips of the beams in a light colour to simulate the hewn parts, Drybrush light grey along the edges of the wood, where sun and rain work at the wood.


This is just the first piece of palisades, but it the central one. And it is fully usable in play, as soldiers can man the parapets and shoot from them.


And, it looks really good on the gaming table...


Montag, 4. März 2019

Rocky outcroppings scatter

The Plains of Rohan, home of the Horse-Lords, the Rohirrim. While I'm not really all good with the choice of location, Peter Jackson used for his movies (to my understanding, that's not really horse-land), the stony outcroppings give some unique character to the scenery.

The scenes were shot a Poolburn in NZ:
To get the character of the locale onto the gaming table, two things are needed: the grassy plains (done with a gaming mat) and those rocky outcroppings.

To me, nothing beats nature when it comes to rocks and stones. So, the first thing to do is gather some rocks. Those are washed and glued to a carboard base with PVA glue.
I then use coarse structure paint mixed with dark brown to fill the gaps and make the stones jut up from the ground. In between, I added some small gravel.
This takes a while to dry. Afterwards, I paint the 'earth' in a dark brown and the 'rocks' in a dark grey.

The rocks are now brushed wiht a lighter grey to define the texture.
The rocks are now washed with a green wash to give them a more natural look.
When the wash has dried, the rocks are brushed with light grey and drybrushed with some really light grey. The 'earth' is drybrushed with a lighter brown.

Now, static grass is applied with PVA glue, and some tufts of grass are added here and there. The outcroppings are now ready for the gaming table.
The actual stones make for a nice weight, so they won't be pushed aside so easliy in play and they help forming a landscape with the gaming mat and books to form hills.


At the Edge of the Woods

I've already written a tutorial on making a battlemat. But now, I've experimented with some different materials and methods, and the result is quite a lot better.

The base is painter's fleece, but this time, I've actually ironed it beforehand. You may skip this, if you use rolled fleece.
I've used some dark grey spray paint on a part of the fleece to get a darker base coat. After that, I mixed up some painter's acrylic, fine sand and acrylic paint (dark brown). This is applied with a broad brush.
The mixture builds a solid textured basing, making the mat thicker than the other one I did. This has additional benefits, as you'll see later on.

Next, I used various tones of brown to make for earthen colours. On some areas, I used coarse structure paint to get a different texture.
After the paint has dried up, I used watered down PVA glue to apply static grass in irregular patches. I've used different mixtures of static grasses and on one side a mixture from NOCH, called Forest Ground.
After the paint and the glue has dried, the whole mat is fixed with some matte clear spray paint. The acrylic takes some time to dry, so best leave it over night.
When everything has dried up, shake the mat well, so all the loose stuff comes off (which is conveniently removed by vacuuming). Now, cut off the border.

The additional benefit of the thicker mat lies in its ability to form a landscape. Simply put some books under the mat and hills will form. This is The Lord of the Rings for the higher hill and The Hobbit for the lower.
The mat forms really good looking hills, which support even heavy metal minis well. Now you can have something akin to an actual gaming table - with a different setup everytime you want.


Mittwoch, 27. Februar 2019

Elven Watchtower

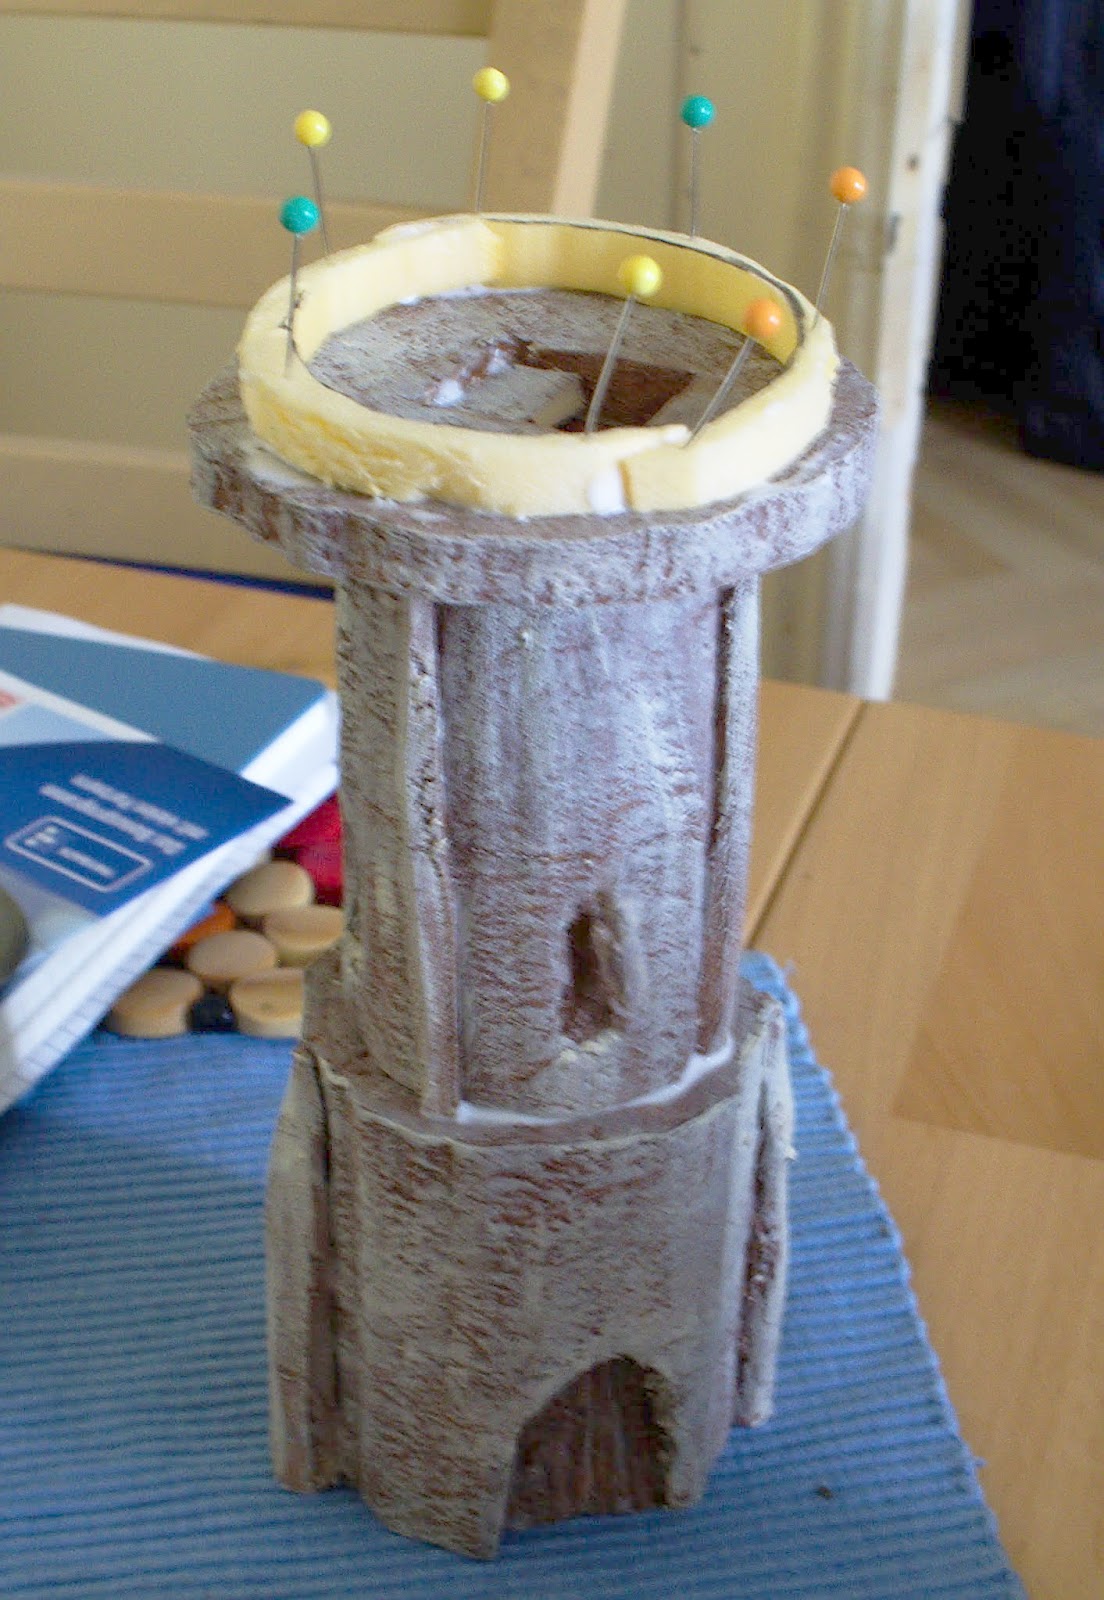
Completing (for now) my elven terrain, I built a watchtower. It is 7" high, but I'd rule that it can be climbed as normal stairs (which are inside the tower), ignoring 1"...

So, the catch with this design is, that it's a round tower. As I've got no specialized tools for cutting round shapes on my Proxxon, I had to make do with careful cutting.
The tower consists of two parts, the upper half being slightly smaller in diameter than the lower one. On top comes a larger platform.

The entrance door and the windows have been carved with hobby knifes. I then used my trusty tinfoil ball to get some texture onto the walls and platform.
The whole building has been base painted with Umbra, then I cut strips of foam to build some false columns onto the walls.

I then painted those parts in Umbra, then brushing with Beige and White.


After glueing the tower together with PVA glue, I cut a balustrade from the leftovers of the lower part, glueing it onto the platform and fixing it with pins. 
The gaps I filled with some texture paint and painted the balustrade the way of the tower. The stairway onto the platform, windows and entrance door were also painted.
Finally, I cut a base from cardboard and added vines, bushes and tufts of grass. Some patches of gravel give the base a more natural look.
Adding some height to the gaming table makes for interesting tactical options.


Elven Longhouse

In my vision of Middle Earth, there are buildings of the Noldor still around, strangely holding up against the winds of time. I've already built the ruin of a small building, but now I want to build something bigger.

Longhouses are places of social encounter, not really meant to be lived in but rather for gatherings. As Middle Earth is set in something akin to our Dark Ages, this concept seems fitting also for elves.

I'm not going to bore you with a detailed tutorial of how I cut the parts from foam, but begin with a picture of the test-assembled building.


As you can see, the roof is detachable, and there are two levels inside. The architecture draws from Renaissance buildings and a touch of Asian influence. The roof itself is just a sheet of paper (though I'd use some thin cardboard next time).


For a base-coating, I used my Umbra paint and dark green for the roof. After that, I brushed with beige and finally white.
Next, I did the base and the floor. I used a piece of cardboard (actually a piece of the parcel my last order from Cubicle 7 came in), and carved the tiles with a ballpen.
After painting the roof first with bronze and finally with gold, I assembled and glued the whole thing together. I added two swan figures on the roof, cut from a thin piece of foam.

Finally, I added vegetation. Vines that grow on the corners and some bushes that sprang up along the walls. On the roof, some patches of moss have grown.


In actual play, the building makes for a nice addition.


Montag, 18. Februar 2019

Building Armies

When I looked through my models from back in the days of the LotR Strategy Game Magazine, I found some from different lists. So, for actual gaming, I'd need two armies - and I was sorely lacking evil models.

I decided on an Angmar army, but not going the usual way with the Witchking as leader. Instead, I chose the Dwimmerlaik. He commands some Warg riders and two bands of orcs, lead by Barrow Wights - and one Cave Troll. This brings the army up to 500 points, which is fine for a start.

I've got more models from the good side, but first thought of going with the Wood Elves. Later I decided on a allied army and finally came up with Rivendell and the Rangers.
Glorfindel leads this small force, with two Rivendell knights (which I have to proxy with Wood elven knights, as the original ones are not available), three High elven warriors with bows and three with swords (models from the magazine). His ally is Aragorn (the Helmsdeep model) with a single ranger sidekick. This amounts again to about 500 points.
While Glorfindel and Aragorn carve through almost everything, the sheer mass and the army bonus of the Angmar army make it possible to counter the two heroes.

I can build up from here, adding models to slowly get up to 700 points.

Elven Ruins

I've done quite some ruins for Frostgrave, some with foam, some with Stewalin-stones. Now, while a frozen city is one thing, to my imagination, elven ruins should have something unique.

When thinking about the elves of Middle Earth, two things come to my mind: elegance and sadness. To work these into a piece of terrain seems hard, though.

So, I started with the 'basic' ruin, cut from foam.


I used a toothed corner in this project (which is rather easy to do with a hotwire cutter). Cutting the doorways and their frames, I used a ballpen to carve the individual stones into the walls. I also cut and carved narrow windows. With a crumpled piece of tinfoil, I pressed some texture into the foam.
Glueing the frames over the doorways and finishing carving all the stones (on both sides!), I got the thing ready for a first fit.
The whole thing will be built on a MDF base. I also cut some stones from foam to place inside the ruined building.
Now I did the first layer of paint. As I wanted the ruin to be of an almost white stone, I began with a terracotta tone.
After a brushing with beige, I finally assemled the ruin on the base.
A brown wash to give it deeper texture.
Finally drybrushing with beige and white and glueing gravel besides the bigger stones for piles of rubble. Fine sand was glued onto the rest of the base and some piece of the old floor was done with cardboard in one corner.
Now, what to do about the look of sadness and passing time? A tree that has sprung up inside the ruined building gives a good impression of how long it has been abandoned.
So I built a tree - you can find the tutorial to this method also here.
The tree grows on the rubble (and is removable for gaming).
Some coarse flock to form some vines and moss for small bushes after a wash of brown mixed with green on the base.
Placed on the table with some trees, it looks really good. For a size comparison, here's Glorfindel.
Combining the FIMO-tree with the ruin has proven to work really fine, because with a fitting wire aperture, the tree stands firm without need for glue. If it gets in the way, it can just be removed and replaced later.